How to install Wamp server in Windows PC
Web developers may be needed to test their web applications or websites before they are publishing. In order to test the web apps and websites they must be hosted in a server space. Hosting a website for developing in the internet is costly and it takes more time for tests and debugging.
There are many hosting providers who provide server space for free. But all of the free web hosting services are allow us to host our website in their server with some limits and conditions.
As a web developer you may need to host your test website in servers without these limits and conditions. In this case we can host our websites and web applications locally in our own computers. This type of hosting without an internet connection is called local host. To host websites in our own computer we need the help of a third party software.
Some of the web developing software programs like Microsoft’s Visual studio are coming with these feature pre-installed. They provides the functionality of live editing of web applications and websites.
Wamp or Xamp servers are the two applications which helps us to host our web apps or websites locally in our own computer. They are providing us Linux based servers in our computer itself. They includes the applications and services like Apache, MySQL, PHPmyadmin, etc.
In Wamp and Xamp servers we can install applications and services like WordPress and Joomla for developing and testing.
In this tutorial guide we will discuss how to install Wamp server in Windows computers.
How to install Wamp server in Windows computer?
Step 1: Download the Wamp server application for Windows.
Step 2: Run the downloaded application with administrator privileges. And click next to proceed the installation.
Step 3: Read the Licence Agreement carefully and accept. Click next to continue the installation.
Step 4: Browse a folder to install Wamp server. I recommend you to choose your work folder as the installation folder. Click Next and then click Install.
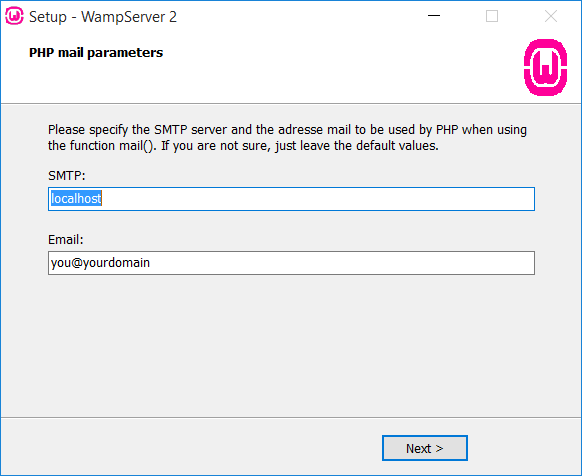
Step 5: Now you will be asked to enter SMTP and Email. Enter SMTP as localhost and click Next.
Step 6: Now, you have successfully installed the Wamp server in your computer.
You can launch the Wamp server applications from the Windows system tray. The root folder of your local server will be named www which is in the Wamp folder where you have installed the Wamp server.


