How to install WordPress in Windows Computer using wamp server?
You may already know that we can create a local server in our windows computer using the software Wamp server or Xamp server.
If you are a WordPress developer you may have to develop and test your WordPress templates or Plugins offline from your computer. Or if you manage a WordPress website and need to test a new theme or plugin before publish and test on your real website. In the both cases above you need a local server in your computer as WordPress installed to test templates, plugins or any other functionalities.
In this tutorial I am discussing how to install WordPress in windows local servers.
How to install WordPress in Windows Computer?
Step 1: In order to install WordPress in your Windows computer, you have to create a local server in your PC using the software Wamp server.
In another article I have already discussed how to install Wamp server in Windows? Please read that article also.
Step 2: Download the latest version of WordPress software from wordpress.org website.
Step 3: Unzip the downloaded file. Select and copy the extracted files and paste in the root folder of your wamp server.
The root folder is located in C > Wamp > www. Paste the files in the folder named www.
Step 4: Now from the Windows start menu search for Start wamp server and launch the software.
Step 5: Now open your web browser and type the URL localhost and hit enter.
Step 6: You will be now redirected to the WordPress setup page. In order to continue the installation you need five things.
- Database Name.
- Database Username.
- Database Password.
- Database host.
- Table Prefix.
We will create these items in the next step, now click on let’s go.
Step 7: Here we are creating a new database for your WordPress installation. You have to run phpMyAdmn to manage your databases.
In order to launch phpMyAdmin, from the Windows tray ions right click on Wamp server and select phpMyAdmin.
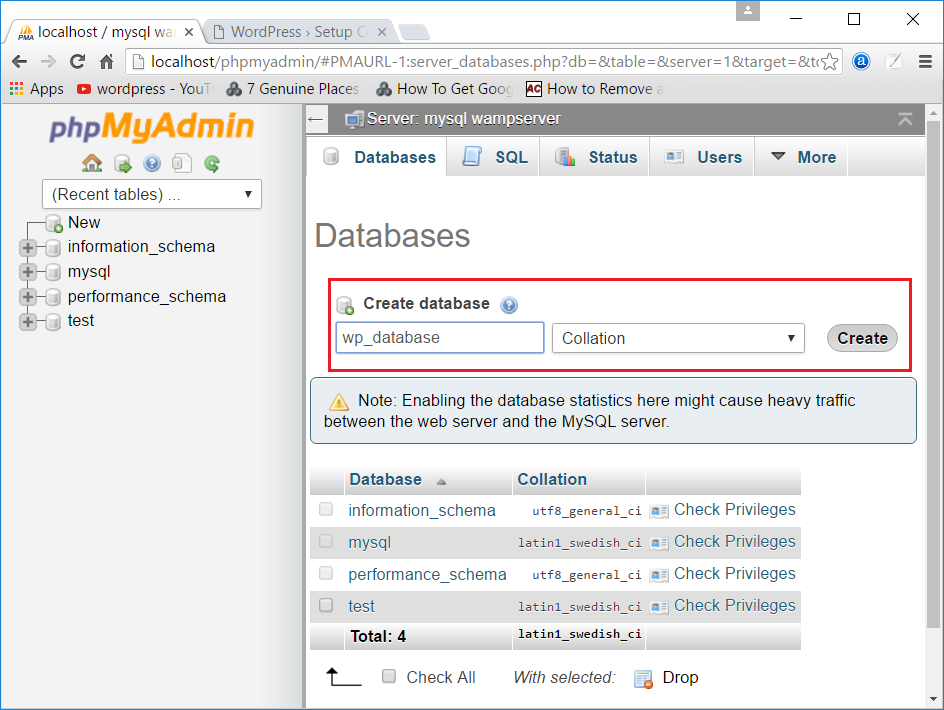
Step 8: In phpMyAdmin window, from the left side panel click on new to create a new database.
Step 9: Enter database name (I choose database name as ‘wp-database’) and click create.
Step 10: You will be listed your newly created database in left side panel, select your database.
Step 11: Now navigate into Privileges tab.
Step 12: Here you can create new users for the selected database. Click on Add user to create new user.
Step 13: Enter database username (wp-user) and select host type as local host. Select password type as Use text field then enter your password.
Step 14: Check to Grand all privileges on database ‘wp-database’ or ‘your database name’. And check all Global privileges. Then click on Go to add the new user.
Step 15: Again go to WordPress setup window and enter database name, username, password, database host local host) as you entered when created database and click Submit button. Please refer figure below.
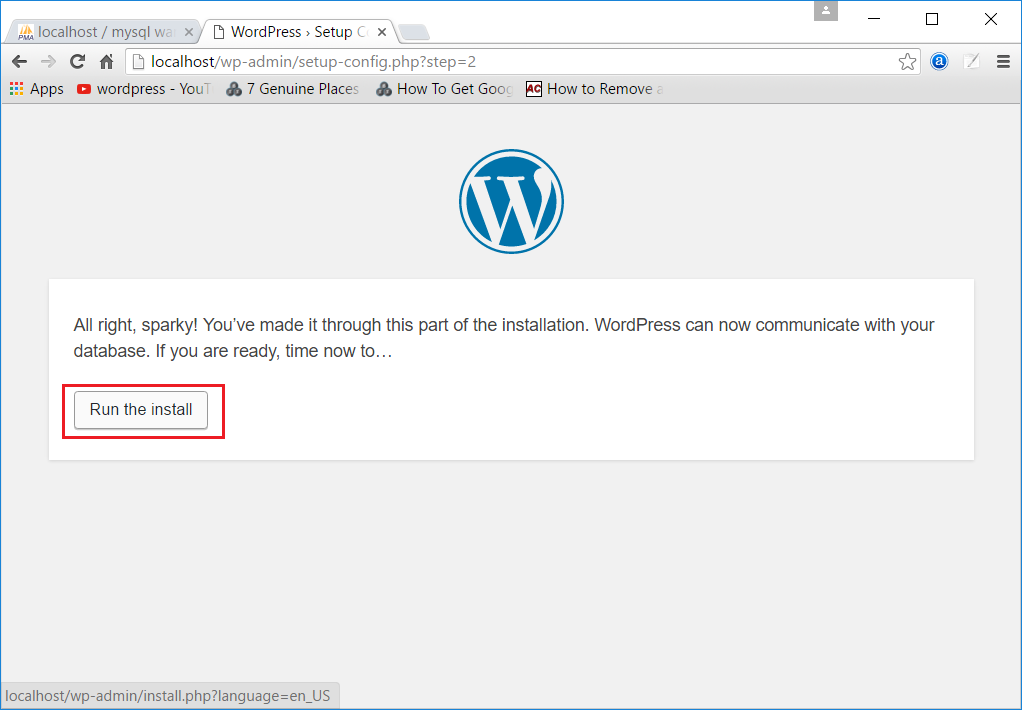
Step 16: You can install WordPress in your local server, Click Run the install.
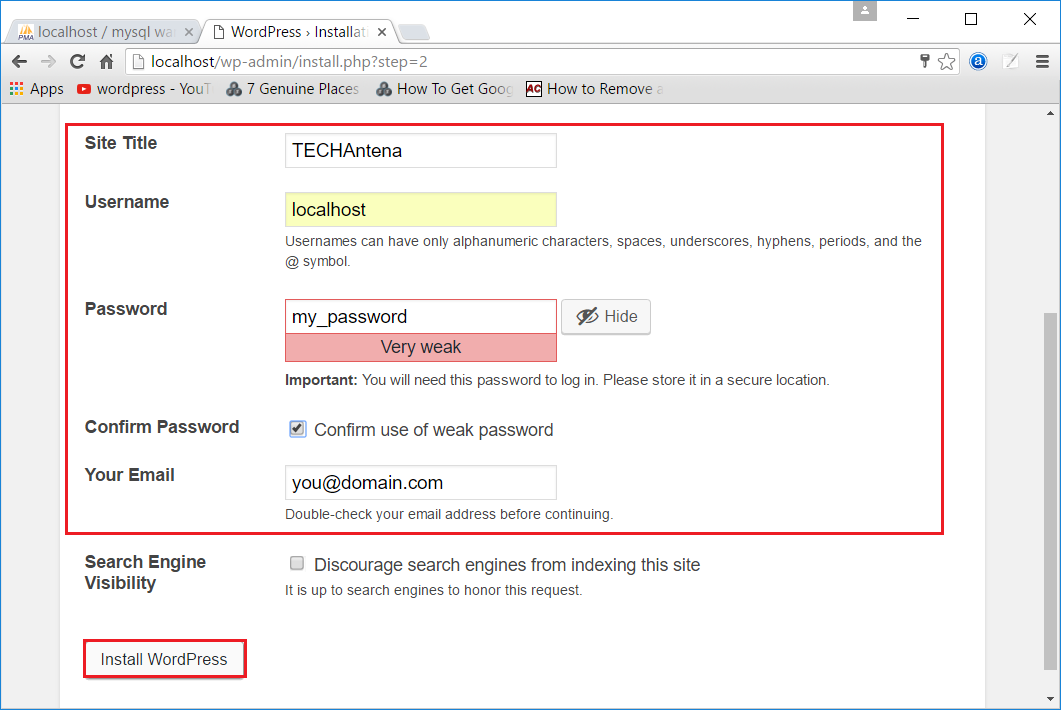
Step 17: In this step you may enter your site description. Choose a title for your test website and provide a username (note: this is the WordPress username not the database username, you may choose a different username like your name). Enter a password for your WordPress user and enter your Email then click Install WordPress.
Step 18: Now you have successfully installed WordPress in your windows computer. Click login to login to your new test site.
Step 19: Provide your WordPress username and password to login to your site.
I hope this article may be helped you. Comment below if you have any doubt or you may contact me personally through the contact page.


