How to create a restore point in windows and protect your computer
Whenever you makes changes in your Windows computer you are changing your system files of Windows. When you install or uninstall a software program or when changing some of the system settings there may chances to occur corruption for Windows’s system files so that your computer will be damaged. So I recommend you to protect your computer by creating a restore point before makes any changes in your Windows’s system settings or when install or uninstall programs. These restore points in Windows helps the computer to restore to an older state.
Some of the software programs automatically create a restore point during their installations or uninstallations to protect your computer’s drivers. In this tutorial guide I will show you how to create a restore point in windows computer and restore your computer to an older state using these restore points manually.
How to create a restore point in Windows manually?
It is easy to create a restore point in windows, you can decide which of your drivers to be protected through Windows restore points. I recommend you to turn on protect only for your system drivers such as C drive where your computer’s operating system is installed.
Step 1: From the Windows start-menu open Control Panel.
Step 2: In Control panel click on System and Security options.
Step 3: From System and Security options click on System. Or you can simply right click on This PC (or My computer) and select Properties.
Step 4: In System properties, from the left side panel click on Advanced system settings.
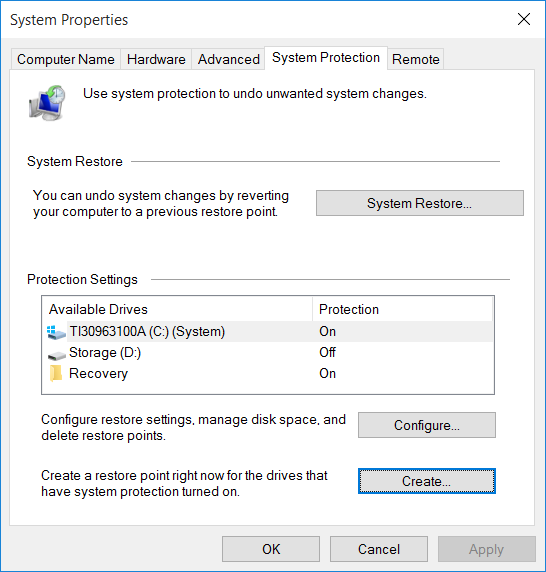
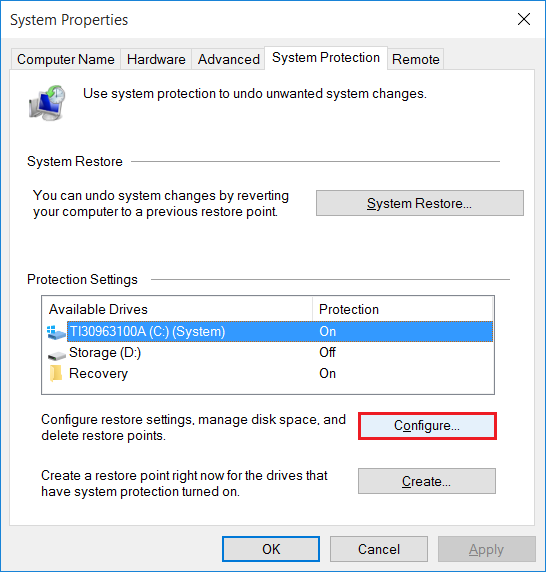
Step 5: From the above step you will be opened a new window called System properties, now navigate in to the tab named System Protection.
Here you can manage your computer’s Restore points. You can create a new restore point or delete existing one.
Step 6: To create a new restore point click Create.
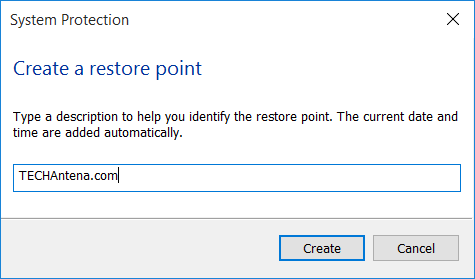
Step 7: Type a name to identify the restore point, you can give names like your PC name + creation date for easy identification.
Step 8: Click create and wait until the restore point created.
How to restore your computer to an older state?
Step 1: From the System Protection tab click on System Restore (Go to step 5 from above)
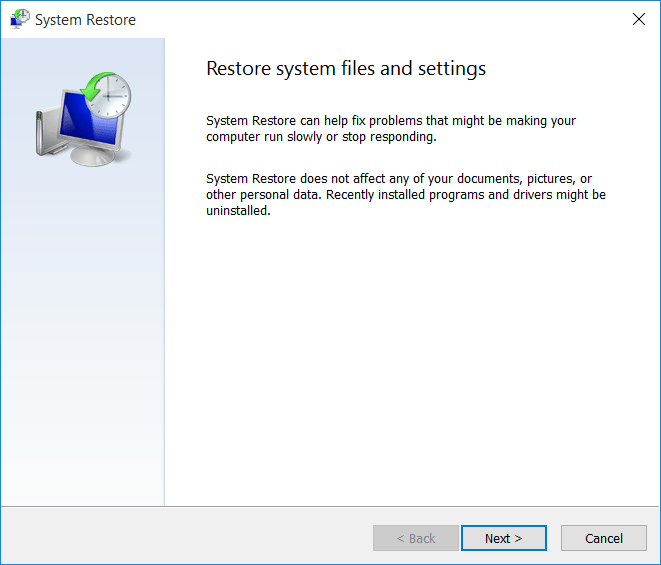
Step 2: From the opened Window click Next.
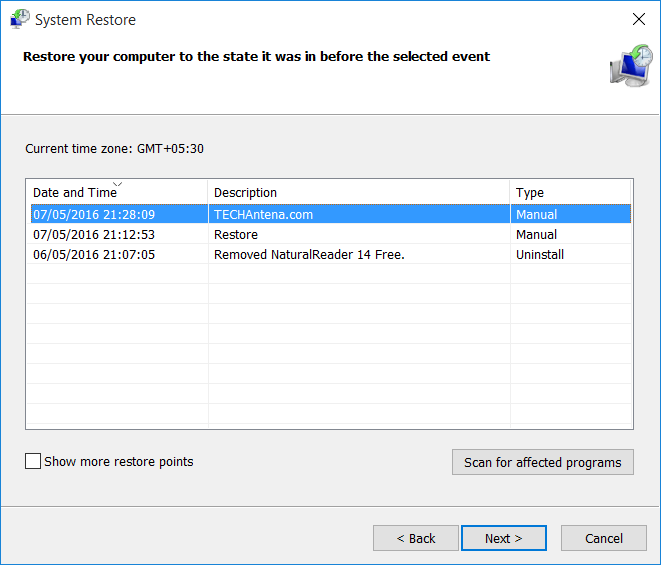
Step 3: Here you can manage your restore points, select the restore point which to be restored, and click Next.
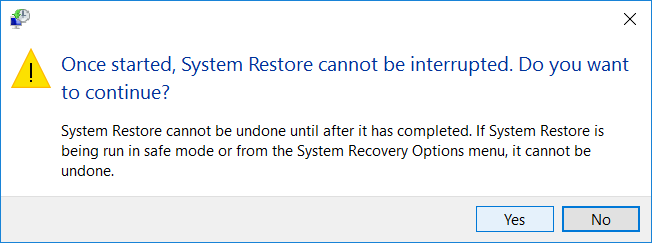
Step 4: You will be noticed a popup warning message click Yes. Note that your computer will be automatically rebooted, save all your works before proceed. (Make sure that you have plugged in your computer or battery has charged. Do not turn off your computer or remove plug until the restoration is done).
Step 5: The system restoration will automatically done and you will get a message like in below image, if the restoration is successful.
How to turn on System Protection for my drivers?
Windows will already have turned on protection for my C drive which contains my operating system files. We can turn on protection for other drivers also. From the System Protection click on Configure.
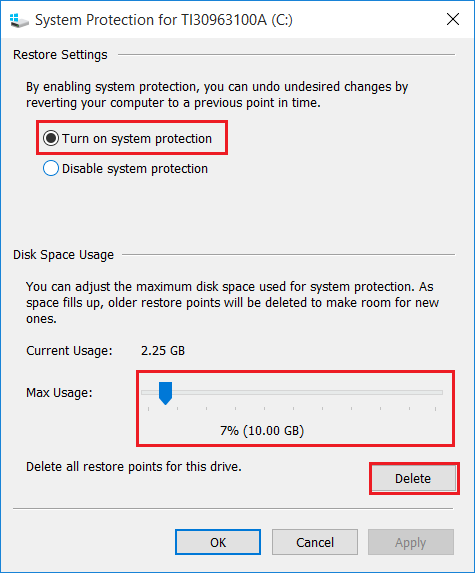
Here you can Turn on or Disable system protection for a separate driver or you can set max disk usage of restore points (recommended size is 10 GB). You can delete all restore points for a drive which includes manually and automatically created restore points by clicking on Delete button.


