How to setup Custom Domain for blogspot blogs?
I have already discussed how to create a blog in blogger platform. As blogger is a free blogging platform they do not provide us custom domain name for our blogs. But we can point our own domain names to blogger blogs. This will automatically replaces blogspot sub domain with our own domain, and the blogspot sub domain will automatically redirect to the custom domain.
Why you should use custom domain for your blog?
Custom domains give more professional looking for your blog. Adding custom domains will help your readers to reach your blogs easily and they can easily identify your blog. There are many advantages for using custom domains for your blogs. Most of the ad network providers requires custom domains for blogs for serving ads. They are not going to accept your blog or website with a blogspot domain or sub domain, even if you have professional looking webdesign and thousands of readers.
How to setup custom domain for blogger blog?
It is very easy to custom domain for your blogger blog. Please follow the below steps.
Step 1: Purchase your own domain name from any domain name provider. The domain name providers that I use.
- Dreamhost
- Godaddy
- Hostgater
Step 2: Once you purchased a domain name, open your web browser and go to your blogger dashboard. Select a blog from your blogs list that you want to setup custom domain.
Step 3: In your blogger dashboard, from the left side panel select basic settings.
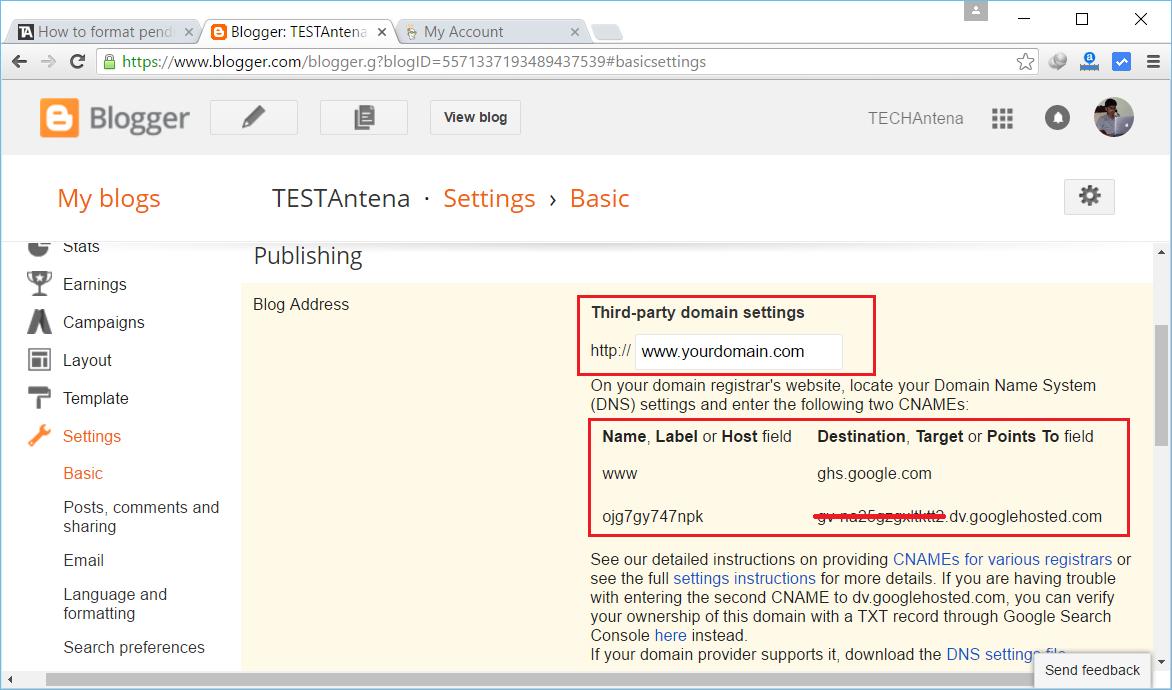
Step 4: In basic settings, you have the option called blog address, now click on Set up a third party URL for your blog.
Step 5: Now enter your domain, remember you should include www in your domain name as google do not offer you to set up a naked domain name without a sub domain.
Step 6: When you click save you will receive an error message which will require you to add two given CNAMEs to your DNS settings. Note down these CNAMEs.
A CNAME contains two parts first part is called Name, Label or Host the second part is called Destination, Target or Points To. These names will help your domain name provider to point the domain into your blog.
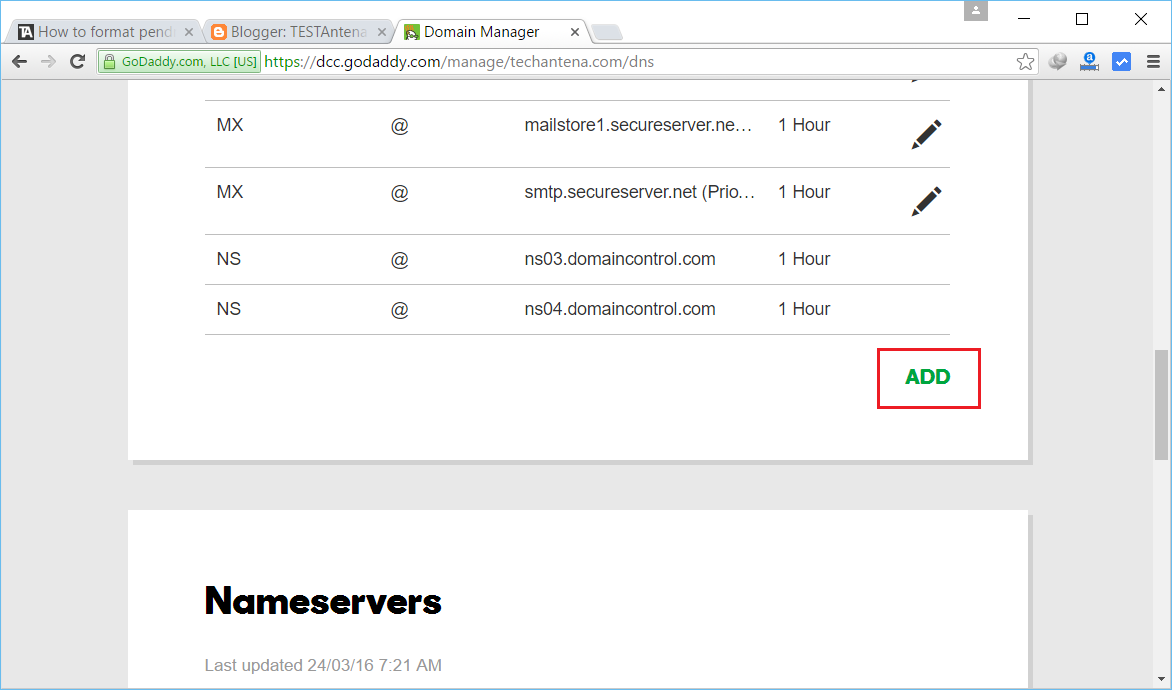
Step 7: Go to the domain name provider’s website and login with your password and domain. Now select your domain and click on Manage DNS or something like DNS Settings. (If you have any doubt this please comment below or contact me through contact forum, I will help you to do this.)
Step 8: Now click on add or add CNAME or something like that.
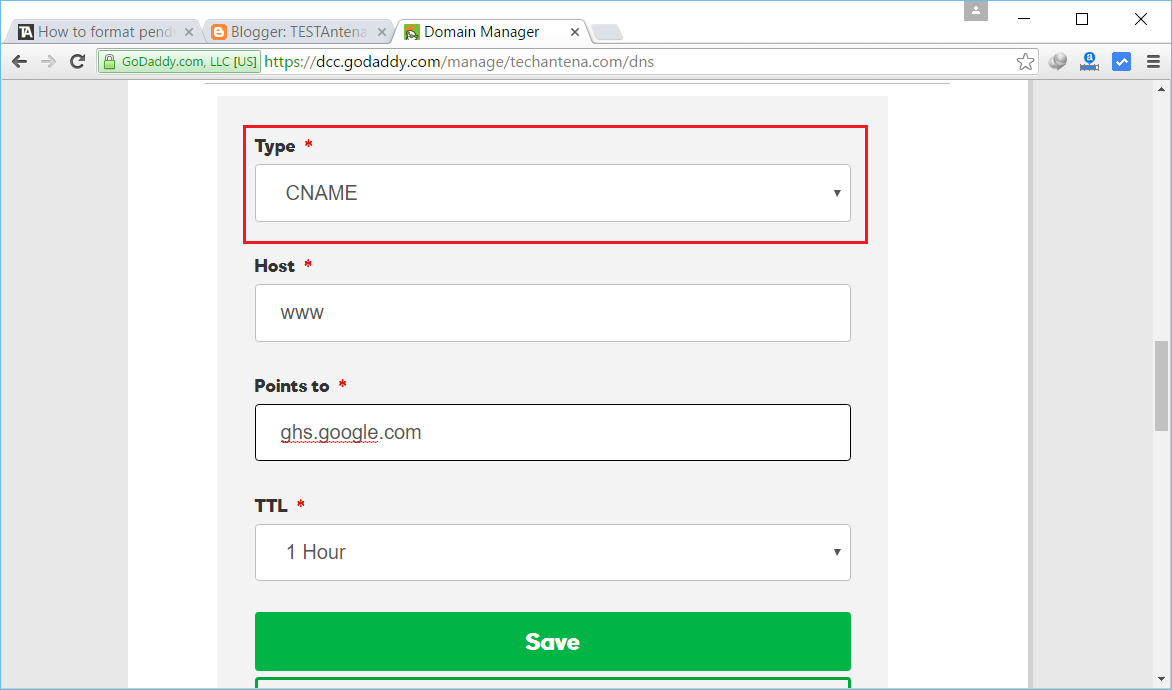
Step 9: Select the type as CNAME, now enter the host or name or label as www, and enter ghs.google.com in point to or target or destination column.
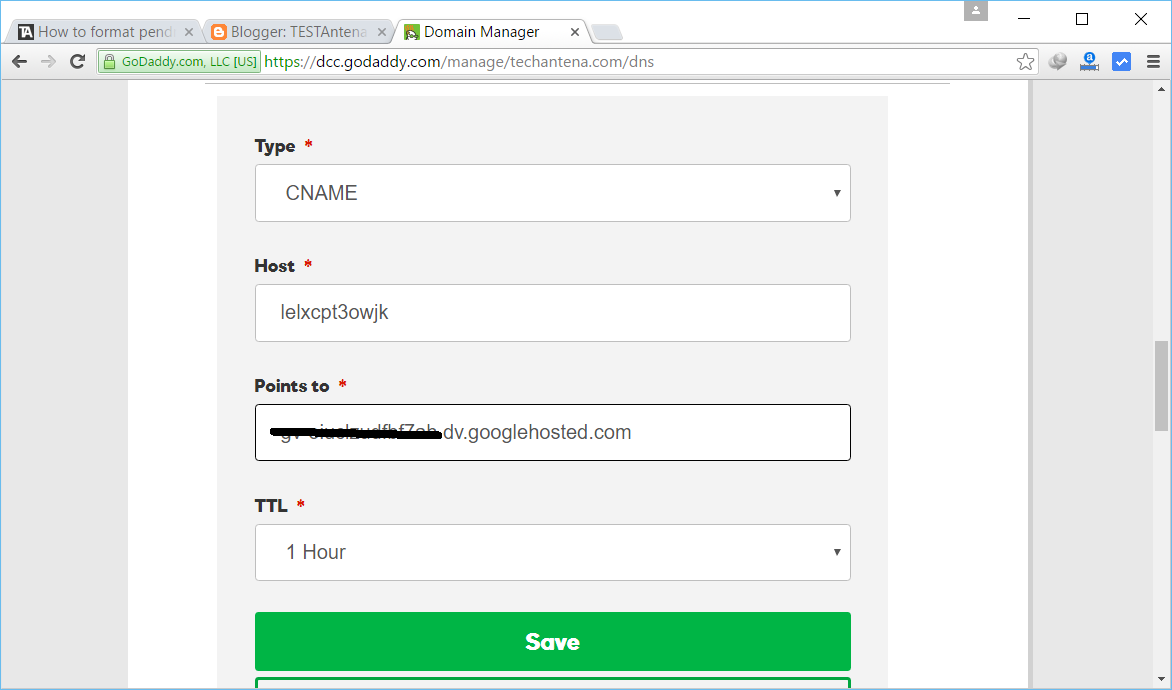
Step 10: Repeat the above step for the second CNAME which will be unique for different users.
Step 10: After one or two hours (in some cases this will take about 24 hours or 10 minutes), do the same steps in step 5 and click save. There error message will be removed now.


