Easy Guide to Move WordPress Site to New Hosting Server Manually

For newbies, it is a troublesome task to move WordPress site to a new hosting server. There are many plugins that allow you to migrate your WordPress site to a new server.
Many people lose their site’s data while the migration of WordPress site using such Plugins. You don’t need the help of any plugins to move your WordPress site to a new hosting server.
This step-by-step guide might help you to do the migration of your WordPress site. This is a manual method of changing WordPress site’s server without using any plugins.
Why Should You Move WordPress Site to a New Hosting?
There are many reasons to people to change the hosting server of their WordPress sites. The major reason for changing the hosting to reduce the down time. At the start up of blogging most bloggers look for cheapest hosting plans. And once they start to get some amount of traffic they forced to change the hosting server.
The another reason for the migration of the WordPress site from one server to another hosting server the large number down time. If you have purchased a low quality or low performing hosting server for the startup of your website or blog, then you might want to change the hosting server to increase and speed of the websites.
Other reasons for the changing of hosting server are the availability less cost hosting server or to overcome the limited amount features.
Step-By-Step Guide to Move WordPress Site to A New Hosting Server
These are the steps to be followed to move WordPress site to a new hosting from an old one.
Step 1: Backup Your WordPress Site
Making a backup of your website is not only for the migration of the WordPress site. But it always helps your website from corrupting while making the changes to your site.
Taking the backup of a WordPress installation files:
We don’t need to backup the whole files from the WordPress installation, only some major files are needed. This includes the media upload files, themes, plugins, database connection files some files that are created by the plugins installed.
Backup wp-content folder: A WordPress installation contains three major folders: wp-admin, wp-content, and wp-includes folders. Here wp-admin and wp-includes folders are common to every WordPress installation. So you don’t need to care about these folders. But you have to backup the wp-content folder which includes all the media files, themes, and plugins.
But you have to backup the wp-content folder which includes all the media files, themes, and plugins. You can either use a third party file transferring program like FileZilla or the default file explorer provided in your hosting server like File Manager in CPanel. If you are using the CPanel File Manager then I recommend you to compress the wp-content folder before downloading.
BackUp wp-config.php file: Every WordPress installation contains a file named wp-config.php. This file stores the database file connections, database user information, and table details. This is a very important file in every WordPress installation. And so, you have to backup this file also.
BackUp WordPress Database:
The database is an another most important in WordPress website. You can backup your WordPress database by exporting the whole tables contained in the database.
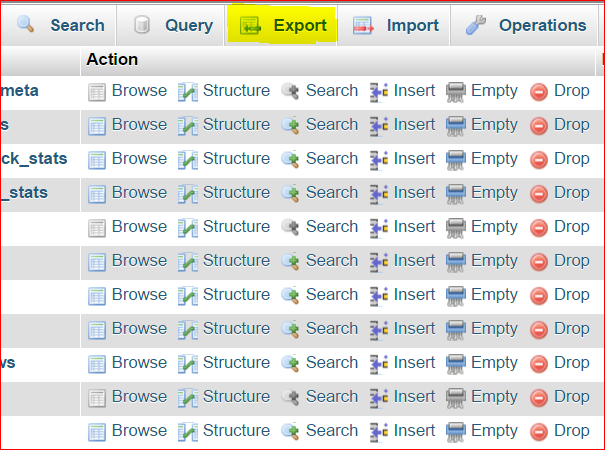
- From the Cpanel, find the Databases section and click on PHPMyAdmin. Then you will be automatically redirected to the PHPMyAdmin of your hosting server. Here you can find the database in which your WordPress is installed.
- Select the database of your WordPress installation. Then click on the Export.
- Choose the Export method as Quick, and the format as SQL, then click Go.
Your database backup file will now be automatically downloaded to your computer.
Step 2: Create Database for new Installation
Now the next step you have to do is create a new database for your WordPress site. Here I show how to create a database in CPanel.
From the CPanel click on MySQL Databases.
Give your database name and click on Create Database.
Once you created the database create a user and add the user to the database you created.
You will be asked to give the user privileges, grant all privileges as shown in the below picture.
Now you have created the database for your WordPress site.
Step 3: Upload the Website backup files
Before uploading (Restoring) the backed up files to your new website server, do the following steps.
- Download the latest WordPress from the official WordPress page.
- Upload and extract the files to your website’s root path.
- Delete the wp-config-sample.php and wp-content folders.
Now let’s restore your website, please do the following steps.
- Upload the wp-config.php file to your website root folder.
- Edit the wp-config.php file and replace the current database name, username, and password with the new one that you have created from the step 2. (Refer the screenshot given below)
- Also, edit the table prefix with the current table prefix. (Find your table prefix of your database from the PHPMyAdmin)
- Now you have restored the database of your website.
- Upload the wp-content folder to complete your website restoration.
Step 4: Update name servers
This is a most important step which should be done at very last of the WordPress migration of hosting server. Even though you have installed your WordPress site on a new server, you have to change the domain name server of your site domain to the new server location.
You should never delete your website from the old server, before 24 hours of changing the domain name server. It will make your site down.
Here you have successfully moved your WordPress site to a new server. Please feel free to ask your queries below and share this post if this helped you.
We can do all of these steps for you, please visit our services page.


